Namaste again to all my beautiful friends. Today back with something new with expression stamps.
Thought of making something on embellishment so found rosette as expression for mother's endless unconditional love and that's why she deserves the batch for all she's.

These are something which looks so unique yet can be used on cards,money envelopes,gifting champaign bottles,batch or props for mother's day as well as baby shower... imagination is endless how one can put them for use.

Here's the tutorial
I used pattern papers from paper maniac cardstock.

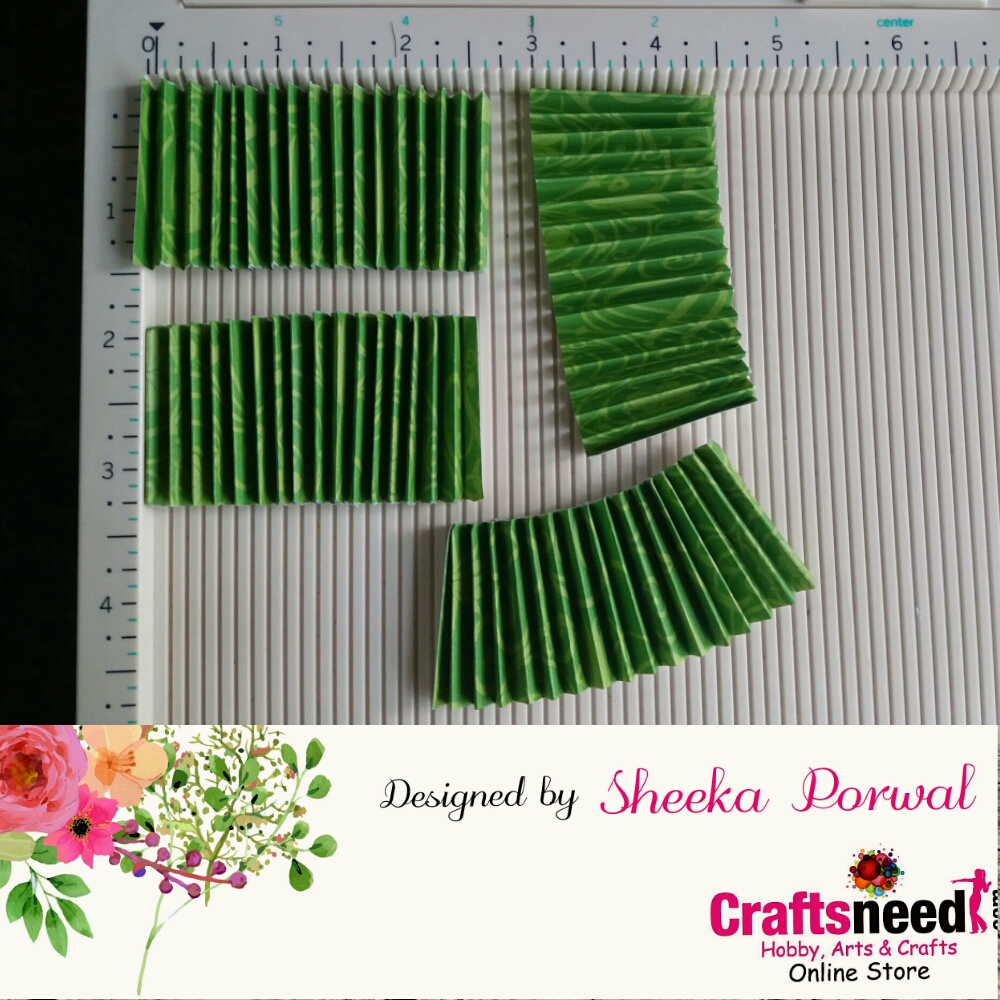
Then I scored every 1/8th of inch till the end to break the fibre bonds of paper so it can be easily folded.

Yorkshire can see the score lines below how beautiful it looks. This can also be used as texture background for other projects.

Then u started folding in opposite in front-page position to formally a fan I am sure this is not something new to many of us.
Then I had cut it in equal at the center to get 2 parts there by 2 more halves from each of the pieces ending up with 4 in total.
To give slight crossed edges by cuttibg them out at edge in V shape. This is very tiny step but results r beautiful.But this step is optional as it takes a bit of time to get done.

I roughly cut 2 circles from my scrape paper and adhere at back of my circled fan so that then stay proper in shape.

Have a look in pic.

I had diecut scallops shapes and stamped 3 different images from craftsneed expression stamps with versa fine ink then by ranger embossing powder and heat set them.

Then I went on inking with my memento inks bahama blue and lulu lavender mixing both colors darkest at ends and lighter in center to give a spot light like look. These two colors merges well which gives a sort of denim blue look.

For the bottom lace I cutout four rectangular strip out of a regular white card stock and inking with same colors on 2 stripes. Later cut them slightly off from edges.bNow glue tge inked strip on white one and cutting in V shape at one end.

Once done ll tge pieces can be stuck on each other to formally Rosette. I also used few more laced circle diecuts, doilies,paper flowers.
I hope I was very elaborate in the procedure would like to hear from you all don't forget to leave your comments down below.
See you soon in my next post.
No comments:
Post a Comment