Hello everyone,
Today we are touching a very interesting topic in this post- distress products and mainly distress inks by Tim Holtz, manufactured by Ranger Ink.
These are the most sought after products in the mixed media and crafting world. People use them for different purposes, however, we still think there is a lot to explore.
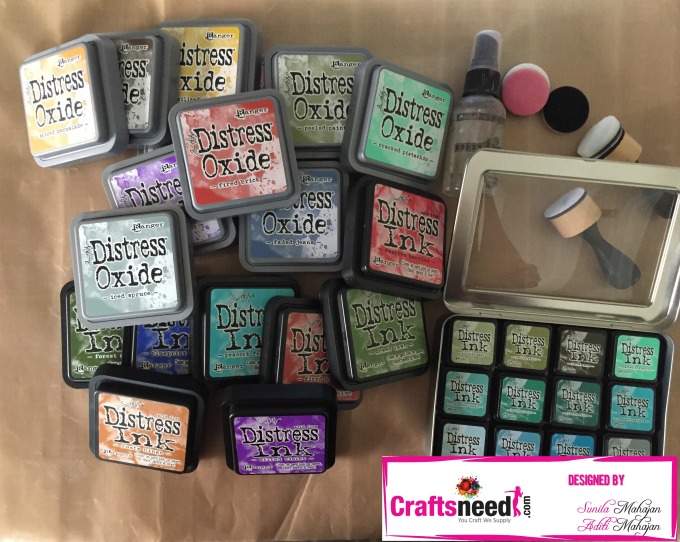
Distress inks come in two sizes the standard 2" ink pads and the minis 1" ink pads. They come in 60 colours both standard and minis. In the standard ink pads there is an addition of one more- Picket Fence (white). These are acid free, water based dye inks- and thats the best part. One can play with them, move them and have fun by just adding water.
These inks are great for backgrounds, stamping, stenciling, embossing, colouring & shading. They work well with the other products in the distress range like paints, sprays, crayons, markers, etc.
The latest product released are the distress oxides. These are water based dye and pigment fusion inks. When sprayed with water they create an oxidised effect. They can be used in the same way as the distress inks.
We'll take you through few of the different techniques with both these inks with examples.
- Backgrounds- Like we said before these are great to create backgrounds. Rub the ink pad onto your craft mat, add two - three colours and spritz water. Lift the colour on your work surface (paper/tag, etc..) by swirling it on the craft mat. Dry with the heat tool after each lift to set the colour and continue lifting colour. You can go on and stop once you're happy. In between spritz water as that creates some marvellous effects especially where two colours blend.


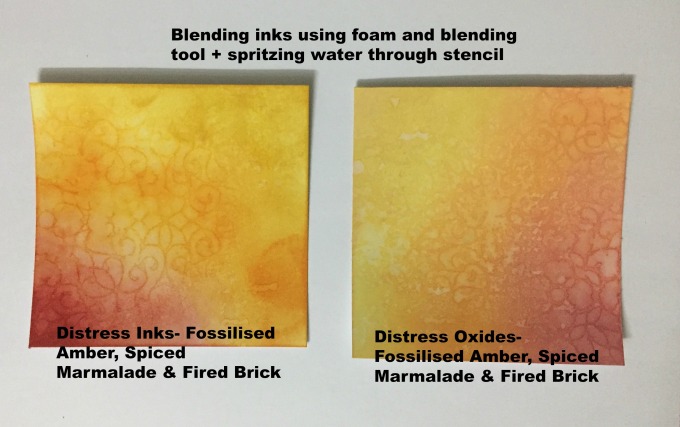
- Stenciling - Use a stencil and go over it with ink on the blending tool with foam. Go in a circular motion. You can cover the surface or stencil randomly. You can use two- three different stencils on one surface. These create great backgrounds as well as ready projects. Another great effect can be achieved by spritzing water through a stencil on an inked background.

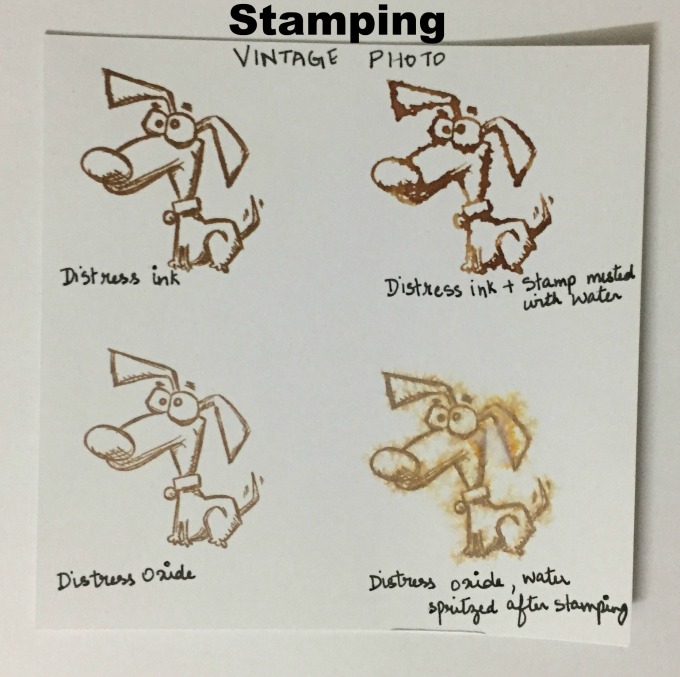
- Stamping- Yes, distress inks are great for stamping. You can use them with clear acrylic as well as rubber stamps. They take time to dry, so don't touch them immediately as you might end up smudging the ink. These are water based inks remember? So when stamping, mist the ink on the stamp with water slightly to achieve a water-colour effect. You could mist the stamp with water (without any ink) and stamp it on an inked background. This lifts the colour, with the stamp design appearing.
- Colouring/Shading- These are great for water-colouring your stamped images as well. Simply use a water brush and the ink. You can use it from the pad directly, for rub some onto an acrylic block/craft mat and use.

- Blending- Both distress ink and oxides are great for blending colours. Oxides however blend better than the inks. When working with different shades of one colour, a great ombre can be achieved by blending colours. Apart from that you can create more shades, by mixing colours like paints.
- Distressing- As the name suggests, the inks are great for distressing the surface especially paper to achieve a grungy, vintage or shabby-chic look. This is best achieved with the brown tones for the distress inks. The brown tones form the oxides give a great oxidised/rusty look.
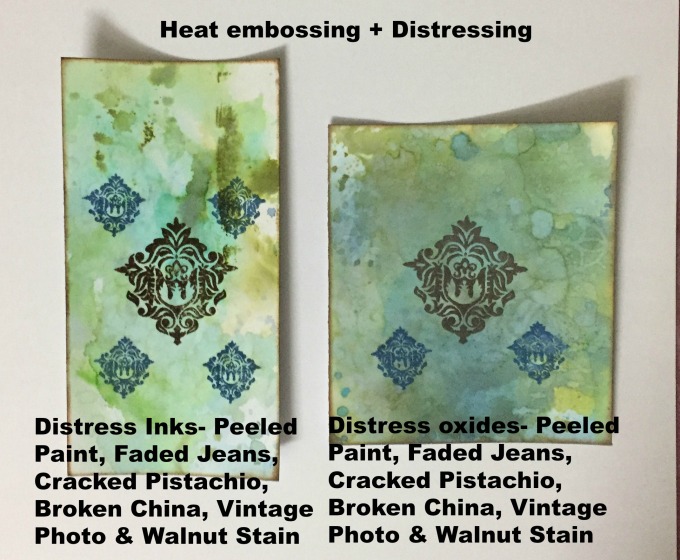
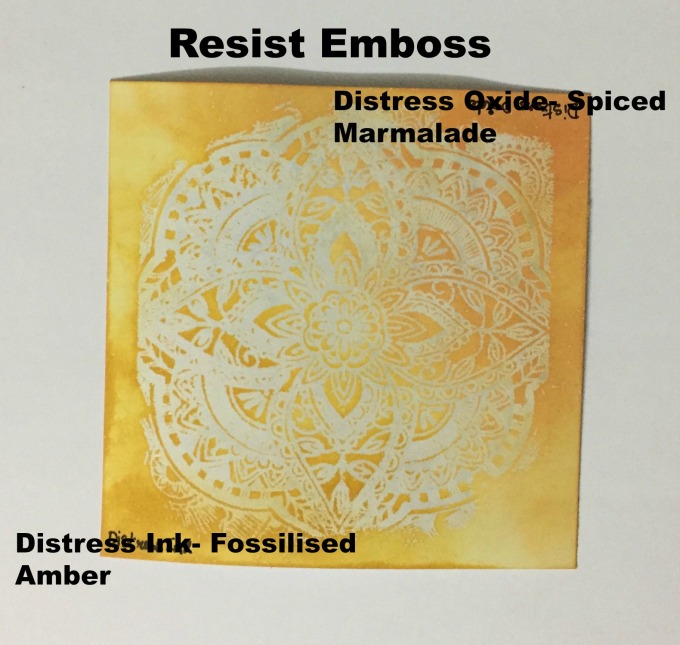
- Embossing- Since these inks take time to dry, you can use them for heat embossing. Stamp an image, sprinkle some embossing powder and heat set it. You can also use it for the resist- emboss technique. Stamp and image using versamark and heat emboss it using clear embossing powder. Rub ink using the blending tool, and the emboss magically appears as it resists the inks.


The other distress products are also as versatile as the inks and can be manipulated with water. They are great to use with each other to create final projects.
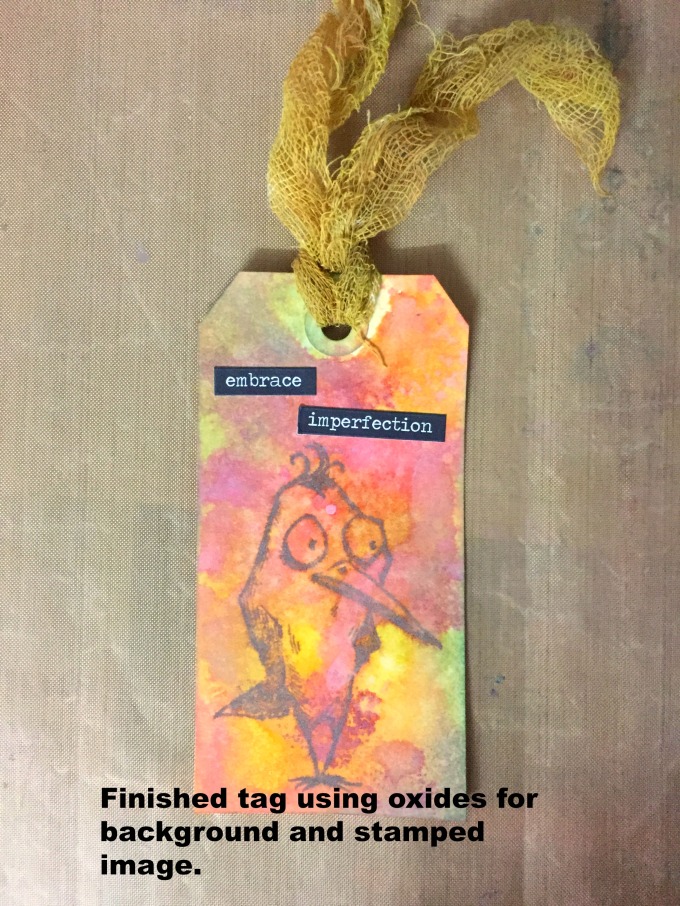
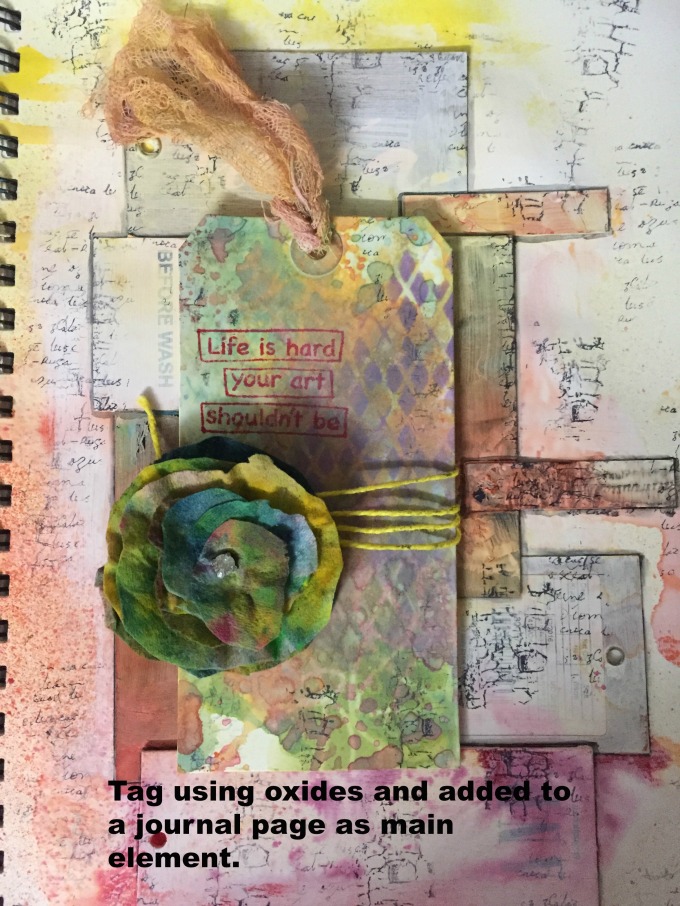
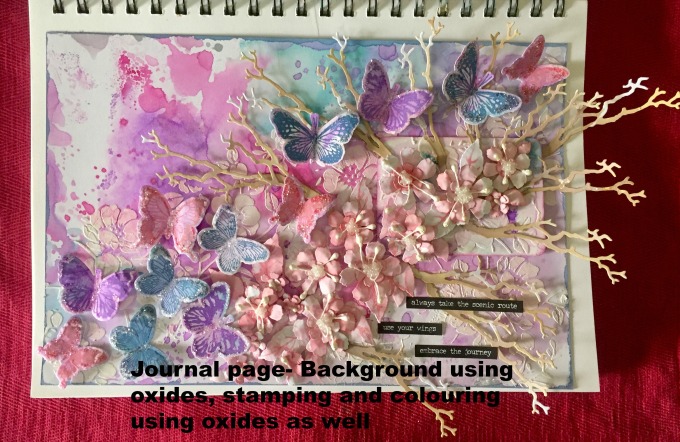
Here are some finished projects using the above techniques:
In this post we've shared a few of the techniques, and there is still a wide ocean to explore. Hope this was informative and has you ready to play with your inks.
Regards,
Sunila & Aditi
Hi sunila mam & aditi Mahajan,
ReplyDeleteAs usual your projects are commendable. Amazing!!!!
Thank you so much for your appreciation 😊
ReplyDeleteGreat job.. thanks for the detailed informative post.. *hugs* -Afreen
ReplyDeleteKudos to both...i am honestly bigggg fan of ur posts!!Always inspiring
ReplyDeleteThank you Afreen and Anushree for your ever encouraging words and appreciation :-)
ReplyDelete