Ho Ho Ho!! Merry Christmas to all..Christmas is here, the
season of spreading love and joy. It’s the most wonderful time of the year ..Here’s
wishing you all from the full team of www.craftsneed.com , May all the sweet magic of Christmas
conspire to gladden your hearts and fill every desire.
My Today’s post is all about Christmas..So let me first show
you what I have in my treasure this Christmas for you all.

Did you like it? Honestly I completely loved making it .Let
me take you through some close ups followed by instructions.


Instructions: For jar project and cupcake, I have used
polymer clay and Thai clay by Craftsneed. Believe me its super soft and ideal
for baking as well. While polymer clay needs to be baked , Thai clay is an air
dry clay which doesn’t needs any baking process. Here I will describe how to
work with both.
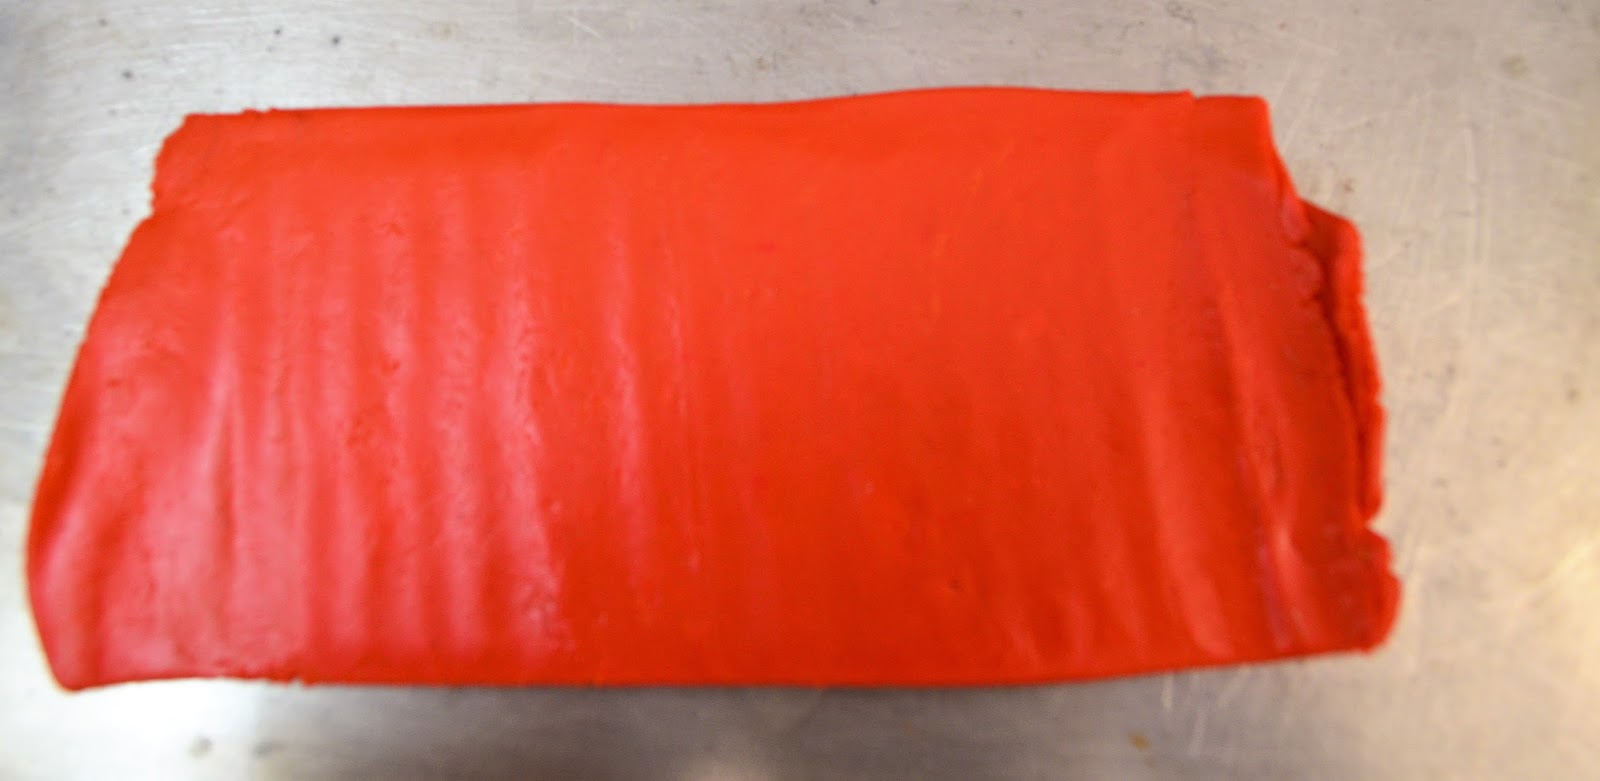
For Polymer clay – I took desired color and straight
after opening the packet passed it through my pasta machine. The pasta machine
has two rollers through which clay passes and extrudes out as a flat sheet. All
pasta machines have roller settings which
helps in getting required thickness or thinness of the clay sheets. I passed my
clay approximately four times through the machine to smooth en it up (This is
also known as curing process)and get perfect finished texture. After that I
started cutting it into desired shapes and sticking layers as and when
required. As the clay is still not baked , it’s still sticky to hold layers
without any glue.


Once finished with
the polymer clay embellishments, now we need to bake it to make it sturdy . To bake polymer clay creations, we need an oven that can
be accurately programmed to generate temperatures between 215°F (102°C) to
325°F (163°C). This range is sufficient to bake any polymer clay item. You can use a regular oven, a
toaster or a convection oven BUT not a microwave oven. I will still
suggest if you are a first timer, try baking smaller pieces first. I have used
parchment sheet under my baking objects. So preheat the oven and place the clay
objects inside. Heating time depends on the thickness of the clay project. I
baked for 30 minutes.


Polymer is quite soft when removed from the oven. It needs to
be cooled completely to reach its final hardness. When polymer clay is cured
correctly, the cooled pieces will be difficult to break, but if it is thin it
might bend easily.
Thai clay: Now I will describe the process of Thai clay as
well…rest all same till curing and sticking layers to clay, after that we need
not to bake it. It is an air dry clay, so just leave it overnight to gain strength.
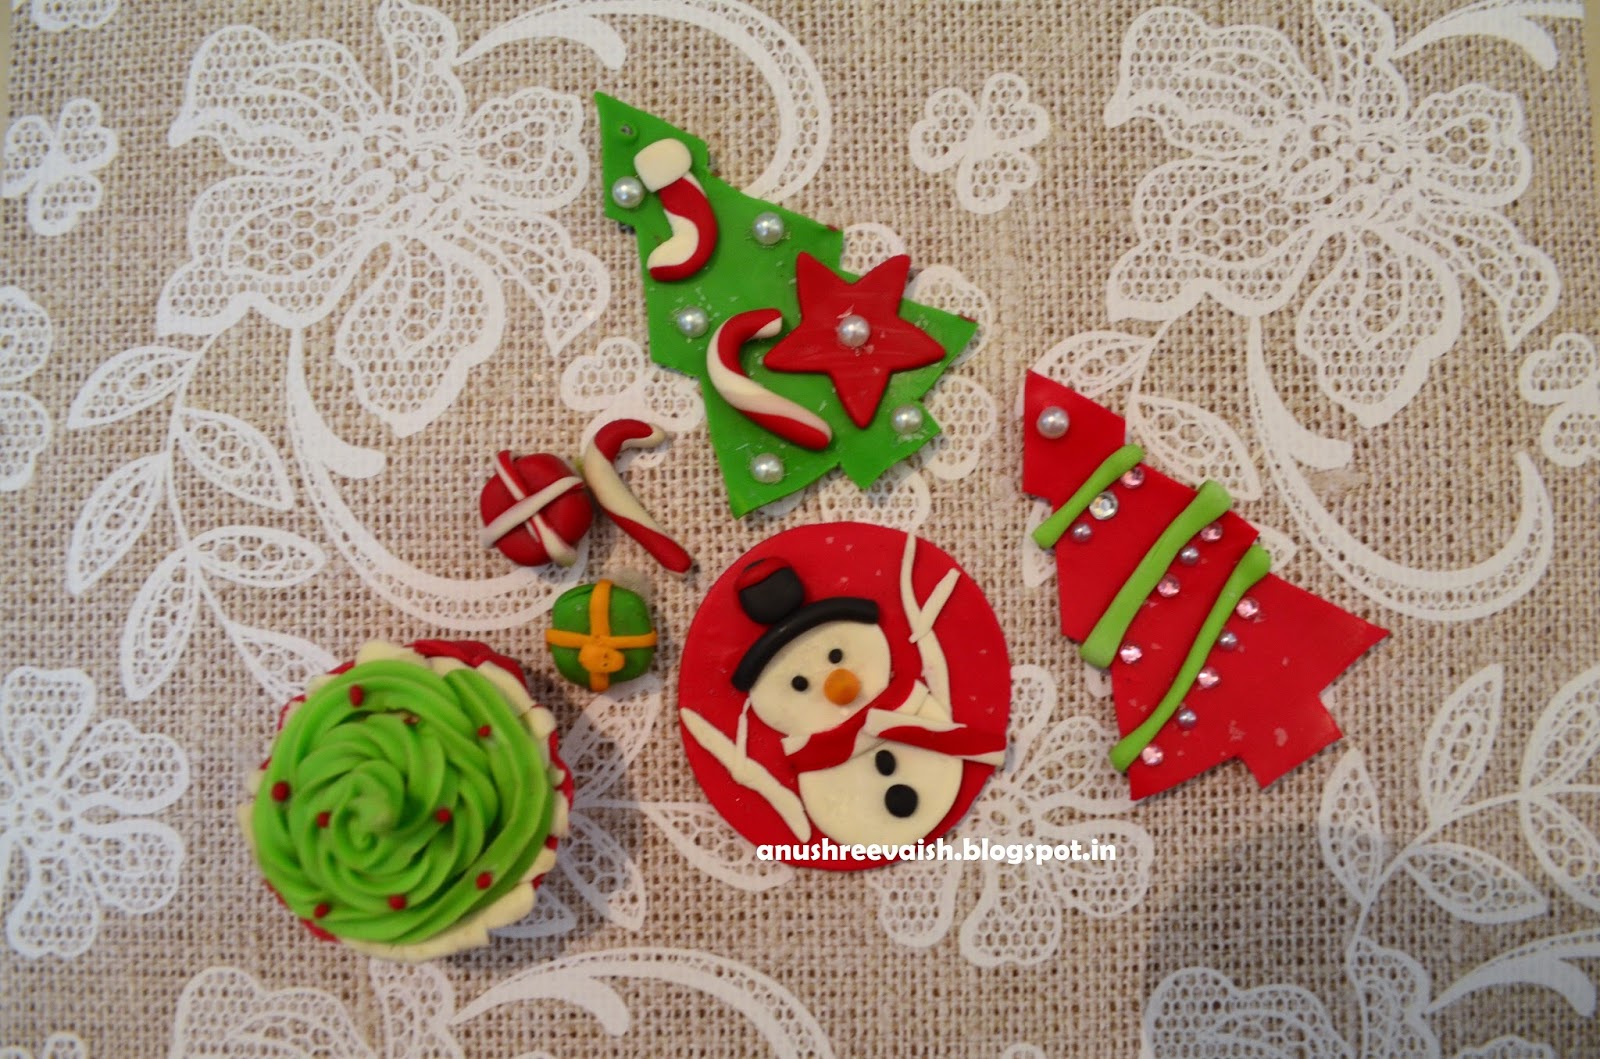
After my clay pieces were ready I stuck some pearl
embellishments with the help of clear glue. I also did a small Christmas card
with the help of Dies,stamps and much loved Zig colors and adding that snow
effect with the help of snowflake paste.

I have put diamond dust in the jar first as base which will
also hold my clay embellishments. I have not stuck my clay pieces to dust in
the jar but I feel that can be done if needed.
Below is list of supplies
I have used for this full project.
1 .
Glass jar, A small tray, pebbles
2 .
Polymer/Thai clay by Craftsneed :
Red,Green,Orange,White and Black
3 .
Pearl embellishments
4 .
Clear glue
5 .
Diamond dust by Twinklets
6 .
Clay tools By Craftsneed
7 .
Pasta machine,Oven and parchment sheet
8 .
Spellbinders Christmas tree die
9 .
White cardstock
1 .
Snowflake paste
1 .
Stamp
from my besties
1 .
Zig colors
All supplies are available at www.craftsneed.com .
You can always place a preorder .
Hope you enjoyed it. Please leave love and
comments below.
Crafty hugs,
Anushree
Pretty card and cute jar
ReplyDeletelove,
Afreen
Pretty card and cute jar
ReplyDeletelove,
Afreen
Wow this is so gorgeous, the card and the clay pieces😊👌🏻👌🏻! Superb!
ReplyDeleteIt's so cute and lovely... And thanks for tutorial.
ReplyDeleteLovely projects!
ReplyDeleteThis is a darling project. Thanks for the tutorial. Especially love that image you used on your card. Great idea using a jar and making that scene. Merry Christmas.
ReplyDeletewow what a lovely project. Awesome colour combo Anu. The mood of Christmas is perfectly depicted here. juz fall in love with the card and the polymer clay stuffs.......
ReplyDeleteMerry Christmas!!
Thank U soo much Afreen,karthika,Riddhi,Barbara,Sunila mam and Bhavani di...u ppl made my day with lovely comments...thnks again
ReplyDeleteHey its pretty!
ReplyDeleteThsnku for the lovely tutorial
ReplyDeleteSuper cute...
ReplyDelete