Hello friends,
Today I have a very interesting post with bags full of information on The art of Paper Quilling and its various tools.Before anything let me take you all to the history and background of this beautiful art.Quilling or Paper filigree is an art form that involves the use of strips of paper that are rolled,shaped and glued together to create decorative designs.The paper is rolled,looped,curled,twisted and otherwise manipulated to create shapes which make up designs to decorate greeting cards,pictures,jewelry etc.
Attaching a picture of my latest work where I taught a lovely girl this beautiful art who loves playing violin.
Quilling starts with rolling a strip of paper into a coil and then pinching the coil into shapes that can be glued together.There are advanced techniques and different sized paper that are used to create 3D miniatures,abstract art and many more things.
When it comes to paper quilling, getting started might seem intimidating, but it's actually pretty simple — especially because you only need a few basic supplies to master the basics. A quilling tool, some paper and a dab of glue are all you need to begin learning this fun craft.
Working with those three tools, you'll get the basic quilling shapes down fairly quickly. But then, you will inevitably want to put your new skills to use and make something awesome, which means you'll add a few extra tools to your supply kit. Let's explore all of the new (and classic) paper quilling tools that are now available and the basics of how to use them.
Slotted TOOL
The most common and easiest tool to learn with is the slotted quilling tool. By placing a quilling strip into the slot, you can easily and quickly roll the tool and create a coil to be shaped without the strip moving around much. The slot does leave a slight crimp in the center of each spiral.
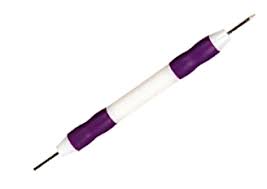
When using a needle tool, you curl the paper around the needle and into a coil. The premise is simple enough, but it takes a bit of practice to become proficient and even longer to create coils quickly. Once you get the hang of it, however, you will be rewarded with extremely tiny and crimp-free centers.
Paper bead tools are also extremely useful and can be used to create a variety shapes determined by how the paper has been cut. Similar in appearance and function to the slotted quilling tool, the bead tool accommodates wider cuts and multiple strips of paper at once.
QUILLING PAPER
Paper, of course, is the most important material when it comes to quilling, but it's often also the most overlooked. A high-quality paper can make a huge contribution to the overall look of any quilling project.Craftsneed site has some best quality quilling strips.
QUILLING MOLDS
Quilling molds are used mostly in 3-D quilling, but the domes that are made from them can also be found in art. After creating a tightly closed coil with your quilling tool, you gently place it over the appropriately sized mold and glide the paper downward.
Once the dome has been made, you can continue shaping it or apply glue on the inside surface to ensure it keeps its shape.
Placing two halves together creates great beads or spheres for other artistic purposes.
SCISSORS
Good scissors are a must when quilling. Thread snippers, originally intended for sewing projects, work extremely well for the tiny paper cuts quilling calls for.
Fringing scissors (in addition to regular scissors) are very useful when creating fringed flowers.
The five blades create small strips that you can wind or quill to create flowers. A quilling fringer or a regular pair of scissors can also accomplish this style
Quilling crimpers create a zigzag texture to quilling paper that can then be gently rolled into loose coils. Crimpers are especially fun for working with children.
QUILLING COMB
A quilling comb is a specialty tool that is used to create intricately laced loops. Individual or multiple strips can be weaved into infinite patterns and are often incorporated into floral art and landscapes.
QUILLING Coach
Quilling coaches can be a huge help when first learning how to control your tool and paper (and for children who want to try the craft). Simply slide your slotted quilling tool in the coach before inserting paper, and you are ready to roll. The flat surface will ensure your coil stays put without springing open unexpectedly.
TWEEZERS
Angled tweezers are a must have in any quiller's kit. When gluing or placing small pieces in place, these tweezers can be the only way to get the job done while keeping your sanity intact.
CIRCLE SIZERS
Circle sizers are great for beginning quillers to make uniform shapes. Recessed spaces allow you to release your coil without fear that it will be too loose or a different size from others. This version has a handy ruler, but other, larger versions might have extra openings for projects that require exact symmetry.
QUILLING GLUE
Last but definitely not least on our list quilling glue in a needle-tip bottle. Using the right glue is just as important as using the right paper and tools, though which glue is best depends on personal preference. Glue can truly make or break your quilling experience and projects, so when trying out different types, keep in mind the ease of use and drying time.
This handy bottle is perfect for keeping the flow and mess in check and ensuring a pleasurable quilling experience. Quilling is an extremely creative outlet and the addition of these great tools only makes it more so.
Paper types
Quilling paper is available on the consumer market in over 250 colors and dimensions. It can be divided into various categories, like solid colored Quilling paper, graduated Quilling paper, two-tone Quilling paper, acid free Quilling paper and other assorted parcels of Quilling paper. It is available in various dimensions, such as 1/8”, ¼” and 3/8 broad paper parcels.
Acid-Free
As the name clearly indicates this is a paper that is completely acid free The quality makes it an outstanding choice for making scrapbooks, rubber stamping, and creating frames for pictures. It assures your project will last a lifetime, without any side effects on the framed picture or album..
Graduated
This type of paper provides an exceptional look to decorative quilling projects. The edges have a solid color that gradually fades to white. When using a graduated paper, a quilling ring begins with a dark shade but ends up being faded to a lighter side. On the contrary, some graduated papers begin as white, or a lighter shade, and then slowly fades into a solid, darker color.
Two-Tone
This is another important type of quilling paper. It is quite similar to the graduated quilling paper in its use. The look consists of a concrete color on one side and comparatively lighter color on the other side. With two-tone paper the color remains same, however the intensity of color is different. The main use of this quilling paper is to provide a desired level of softness to the quilled subject. It possesses the capacity to quill many papers in a single spiral.
All these supplies are available with
http://www.craftsneed.com/
So start your shopping now and enjoy this beautiful art.
Happy crafting!!
Hugs,Anushree