Hello everyone!!
Anushree here with another post showcasing the versatility of Papericious paper packs.These packs are available on the site with wide range . You can click here to shop yours http://www.craftsneed.com/
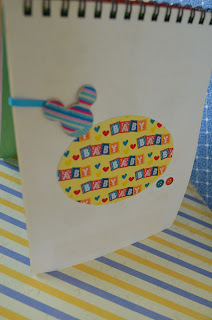
So let me show you the picture of my super cute calendar
Anushree here with another post showcasing the versatility of Papericious paper packs.These packs are available on the site with wide range . You can click here to shop yours http://www.craftsneed.com/
So let me show you the picture of my super cute calendar
Supplies used:
1. Handmade paper(different shades)
2. Papericious Little star paper pack
3. Wire binder
4. Some diecuts and embellishments from my stash
5. Clear glue and double sided tape
Instructions:
I started with cutting handmade paper as base sheets for calendar.I took 13 such sheets of equal size which comprises one as main front cover and rest as 12 months of calendar.After that I covered them with designer printed paper.Then I got wire binding done from a local printing shop.This was time saving and much easier than doing myself.
So now I am all ready to explore this Little star Pack from Papericious
Before that I have taken a green color cardboard and made the back base with holder.I have used cutting knife and puncher for doing this.
Now I have done some fussy cutting from the Little star Paper pack,I have also done some die cutting using the same paper pack.
Now its time to stick and explore creativity,Next I am showing you pictures month by month,I have also decorated and made photo mats on back of each month cover.Staring with front and back of calendar.
Now months
Showing some close ups now
Hope u liked it.This one was super fun to make.
All material is from http://www.craftsneed.com/
Happy Crafting.
Anushree


